Learn how to use the hole wizard feature in SolidWorks with a step-by-step tutorial.
We will use the hole wizard feature to join two created pieces together with a socket head cap screw.
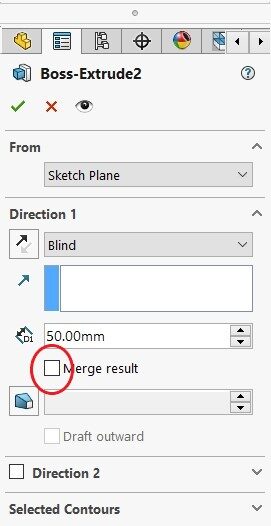
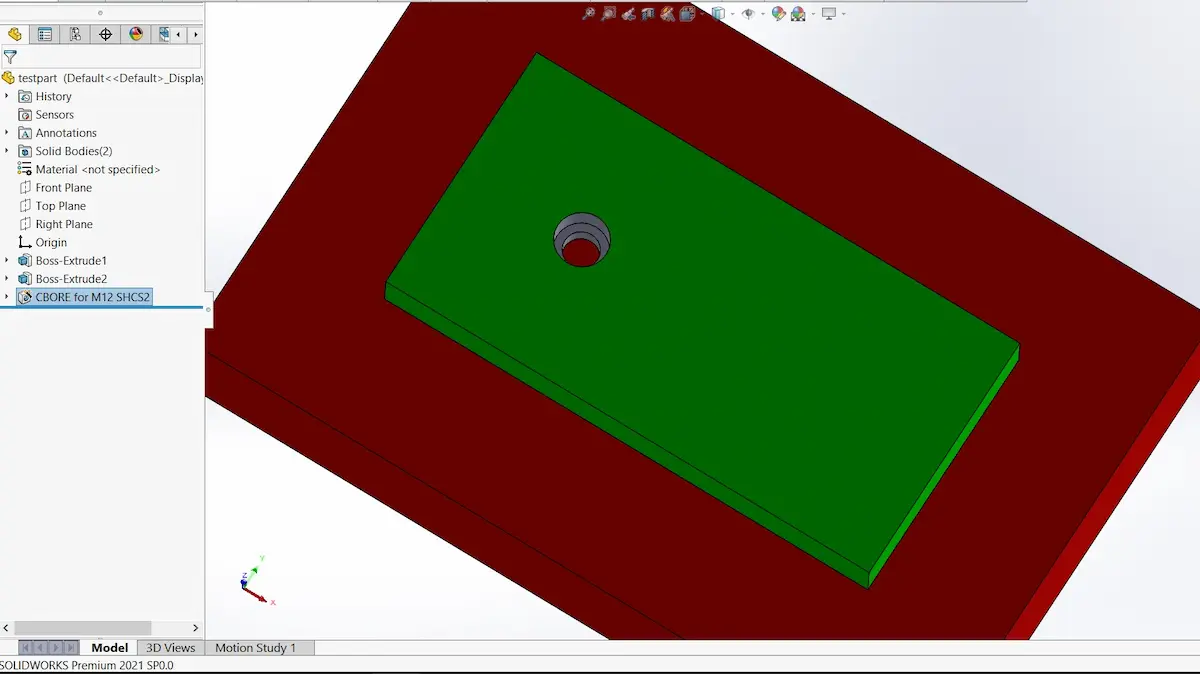
Create the two pieces and enable the hole wizard.
You can create the two pieces in one part or two parts in one assembly.
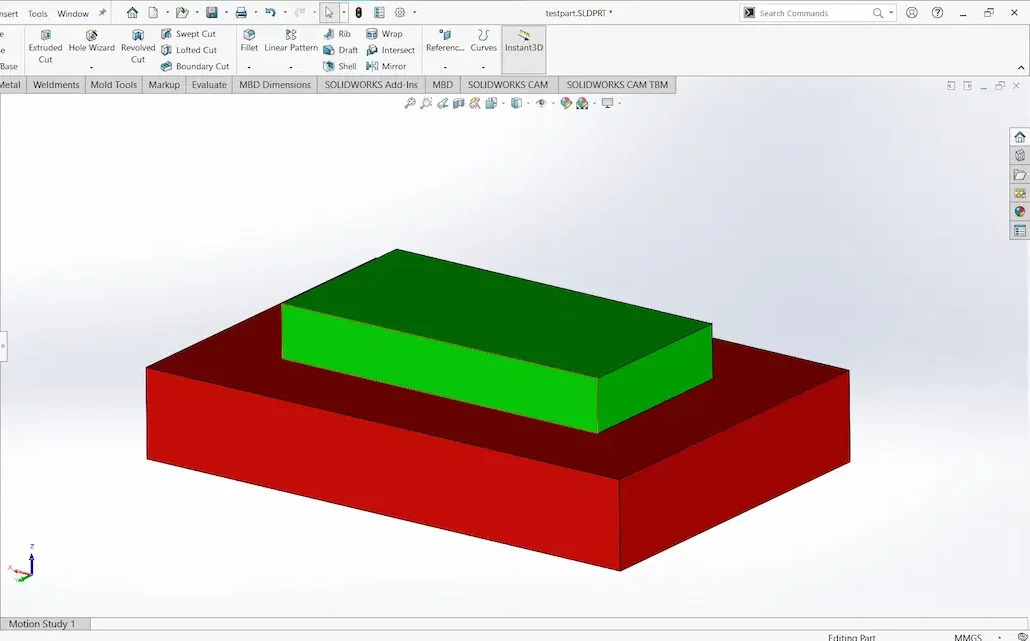
- Just make sure that the merge result checkbox is disabled so we can have two bodies.
Go to features then choose hole wizard.
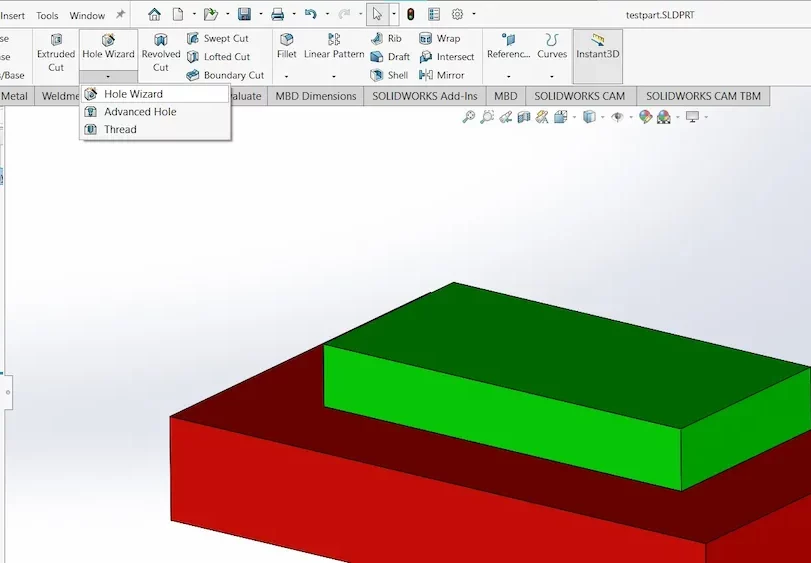
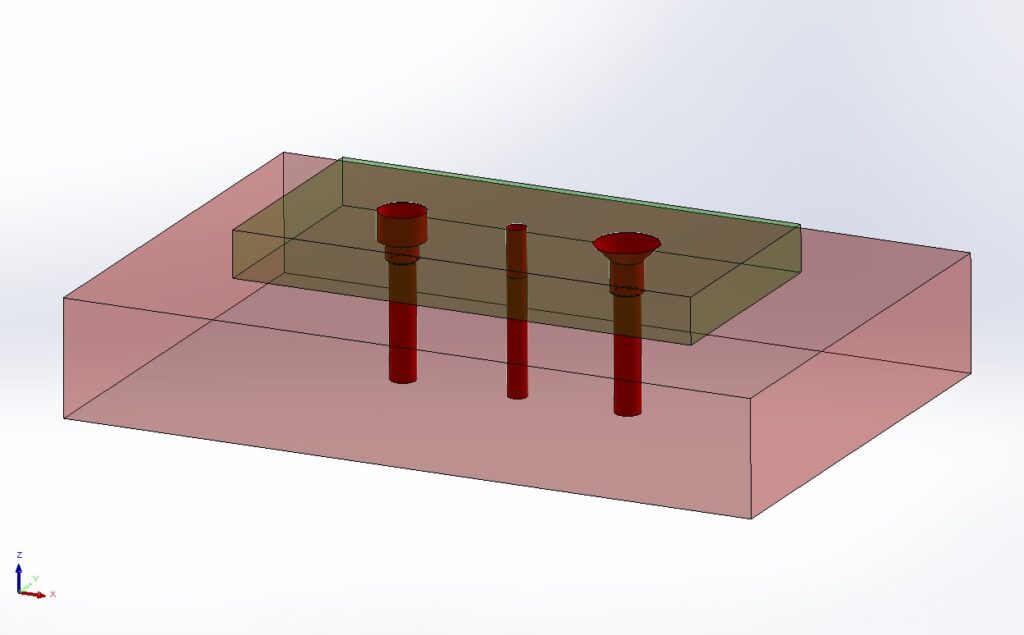
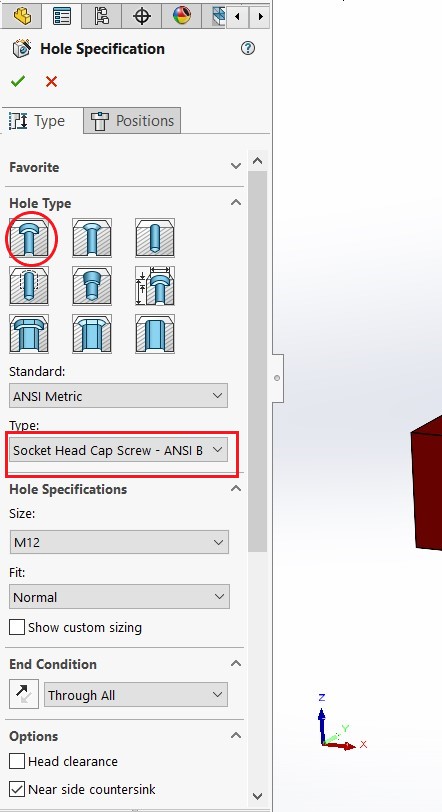
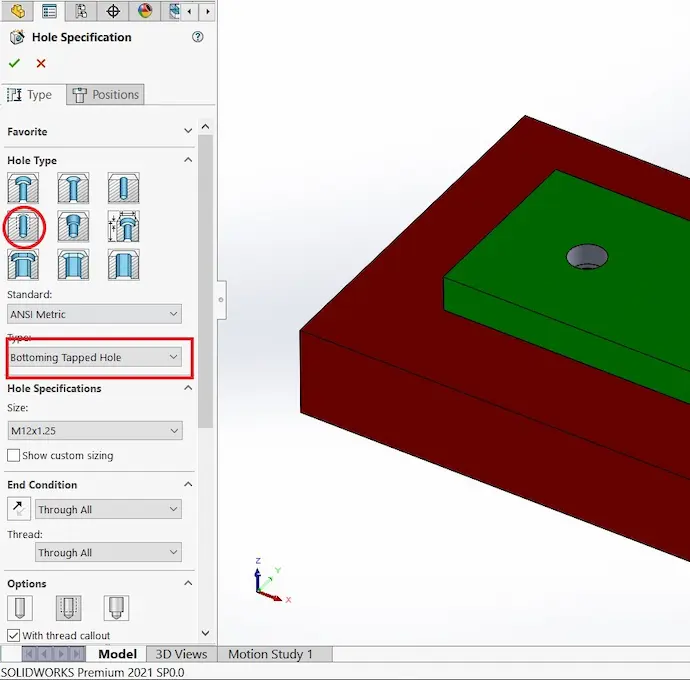
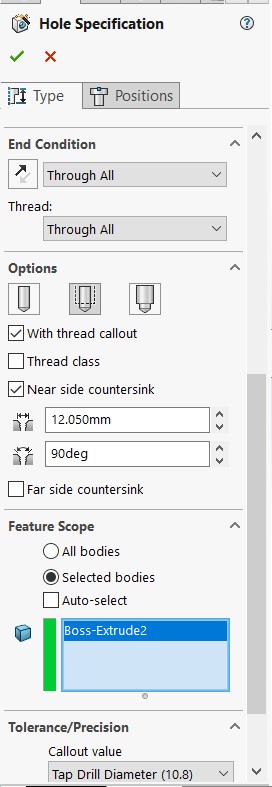
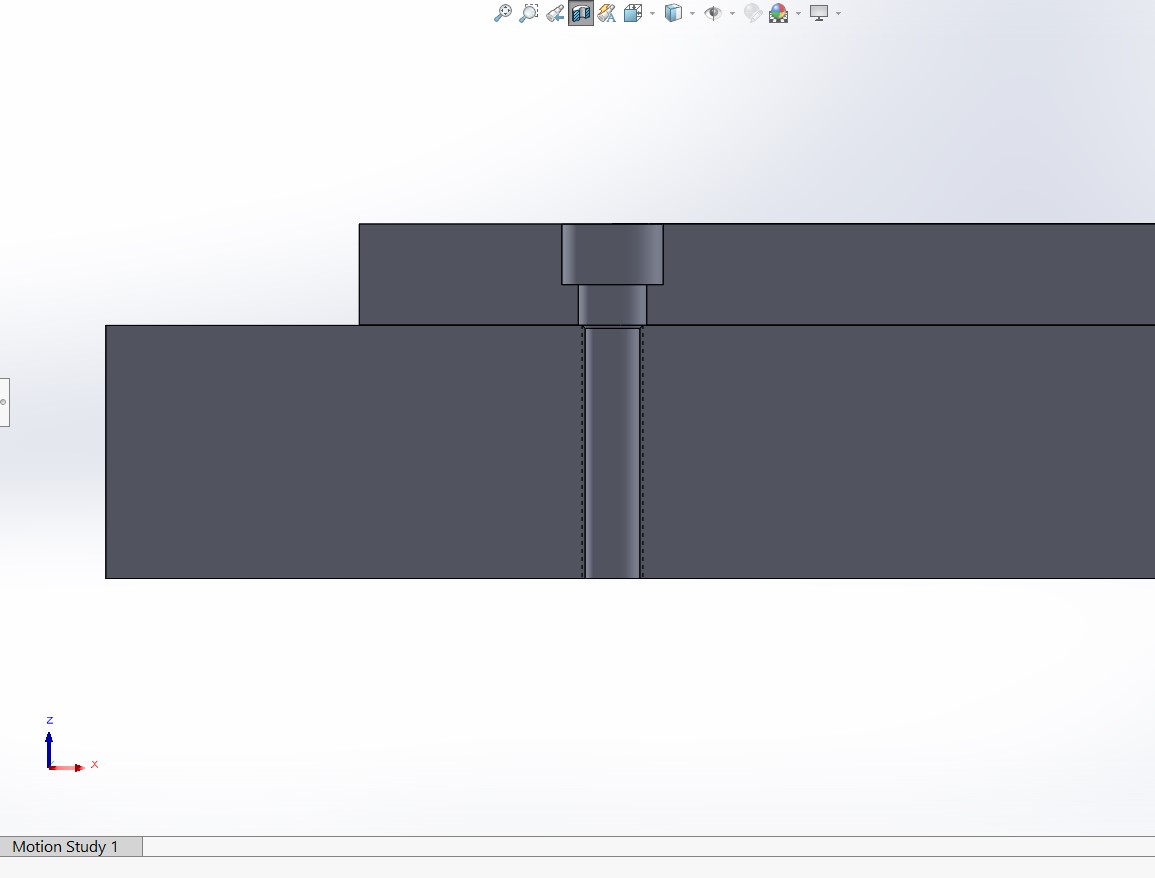
In the Hole Specification Menu choose the hole type desired, We have picked the counterbore hole for a socket head cap screw.
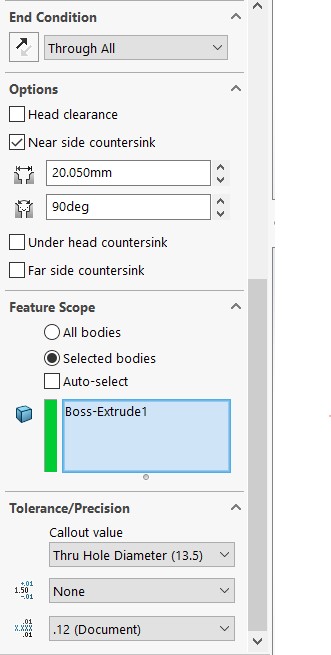
Then complete the setting of hole diameter, and tolergance and select the upper body when the counterbore will be placed.
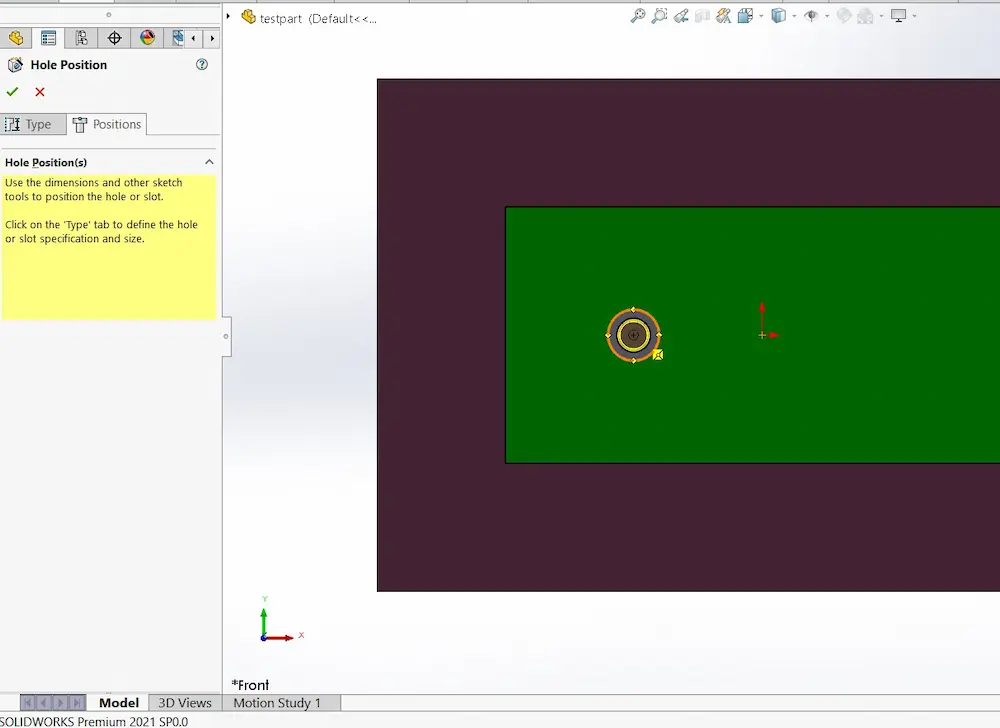
Now select positions and choose the upper surface of the body.
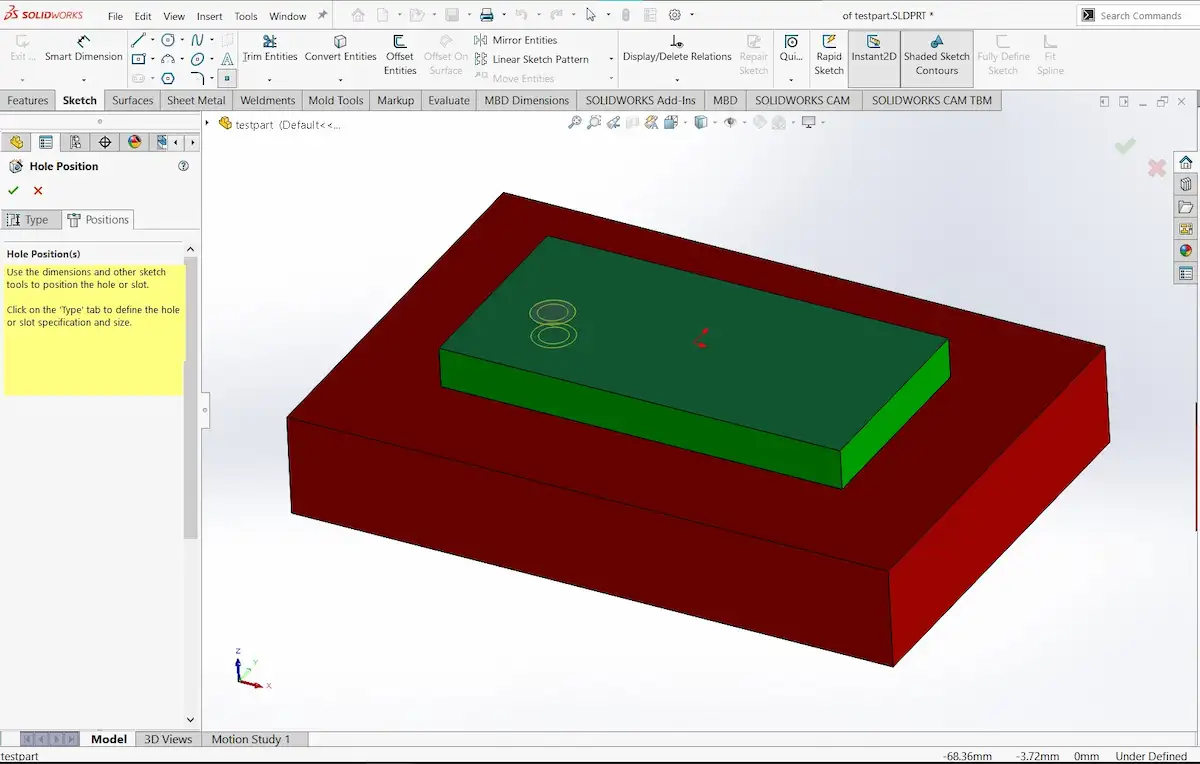
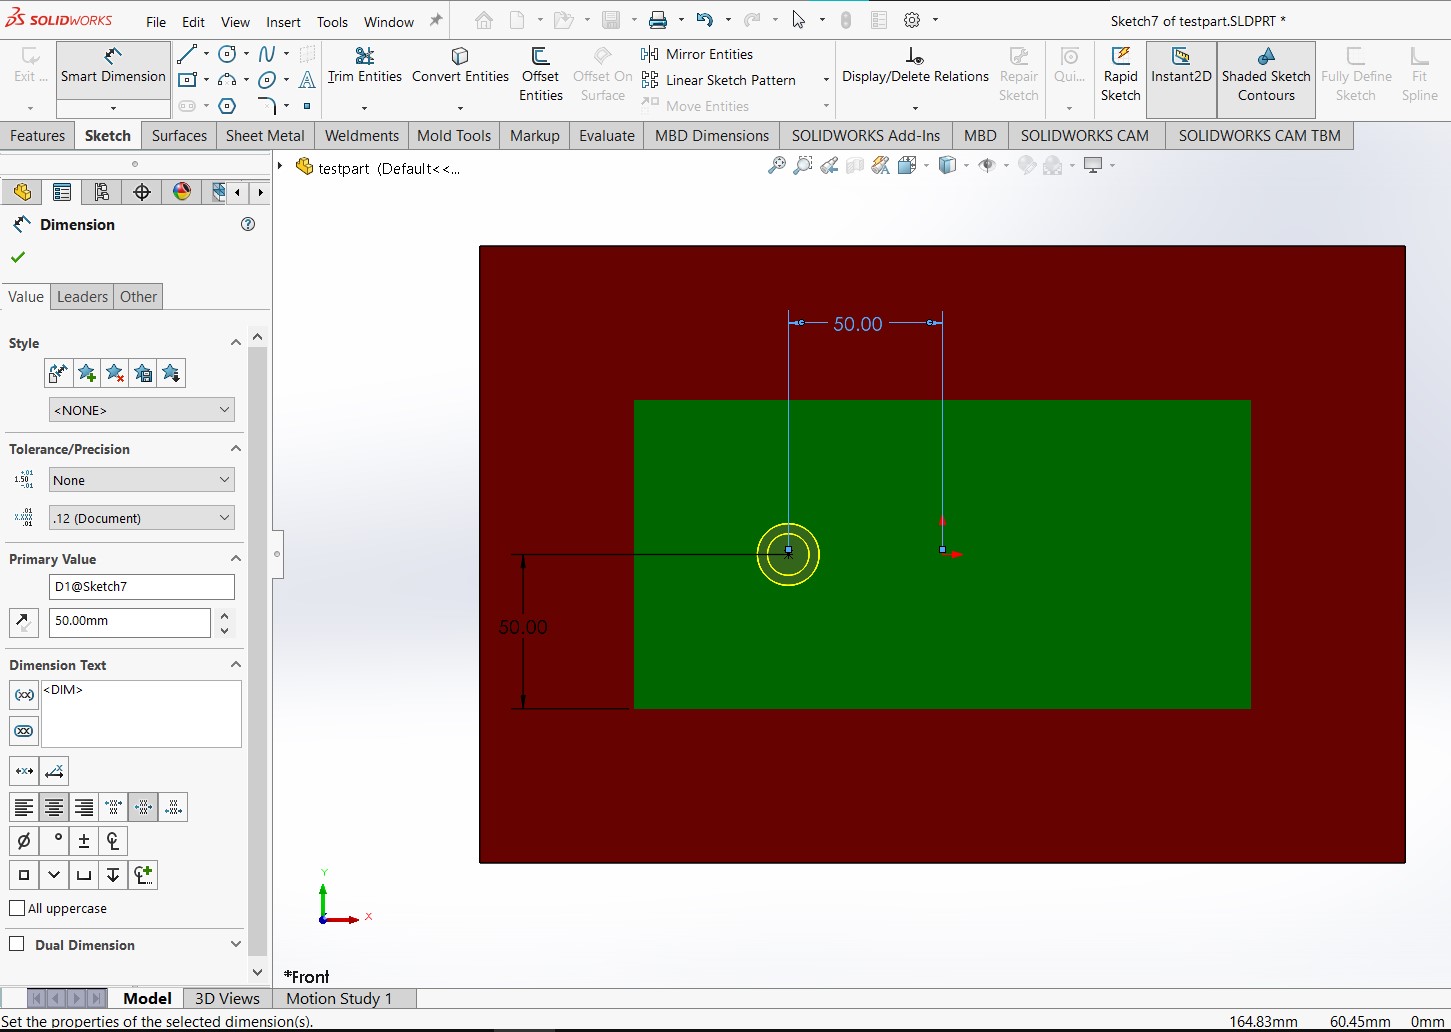
Set the desired location of the hole using the sketch smart dimension tool and press enter.
You have got the screw clearance hole.

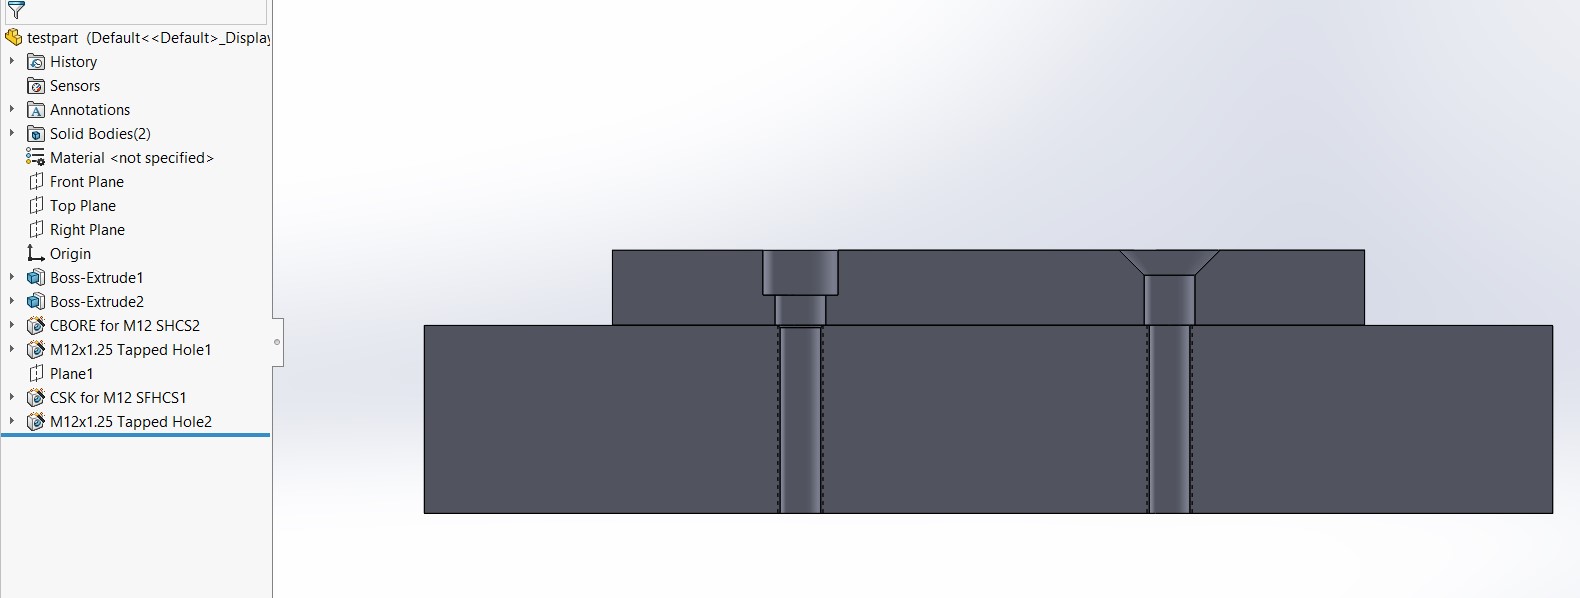
Adding the Thread Hole
Go back and select the hole wizard icon.
Choose straight tap as a hole type for the threads, fix all the hole parameters, and select the lower body.
Again select position and the upper surface of the body.
Move the new hole to the center of the previously created hole, so they can be coaxial, And press enter.
Finally, you will have a proper hole assembly for two pieces for a counterbore screw.
You can repeat the previous steps with a countersink hole for a flathead screw.
In this tutorial, we have designed the required holes to join two pieces with a socket head cap screw.